Why Brake Inspection Matters More Than Most Buyers Think
Direct answer: Brake pads on a used car can range from brand new to completely consumed — and a car with worn-out brakes stops, steers, and feels normal during a casual test drive until it does not. Sellers are not required to disclose brake condition, repair shops are not required to flag brake wear on routine oil changes, and a vehicle history report does not record brake maintenance. The only way to know the brake condition of a used car is to inspect it yourself.
The cost spread for brake repairs is wide. Brake pads alone on a single axle cost $150–$300 installed. Pads and rotors together on one axle cost $250–$500. All four corners — both axles — with pads and rotors cost $500–$1,200 depending on the vehicle. On a luxury or performance vehicle, all-around brake replacement can exceed $2,000.
These costs are not hypothetical. They are the immediate post-purchase repair bills that buyers who skip the brake inspection routinely face.
The Static Brake Inspection — What You Can See Without Moving the Car
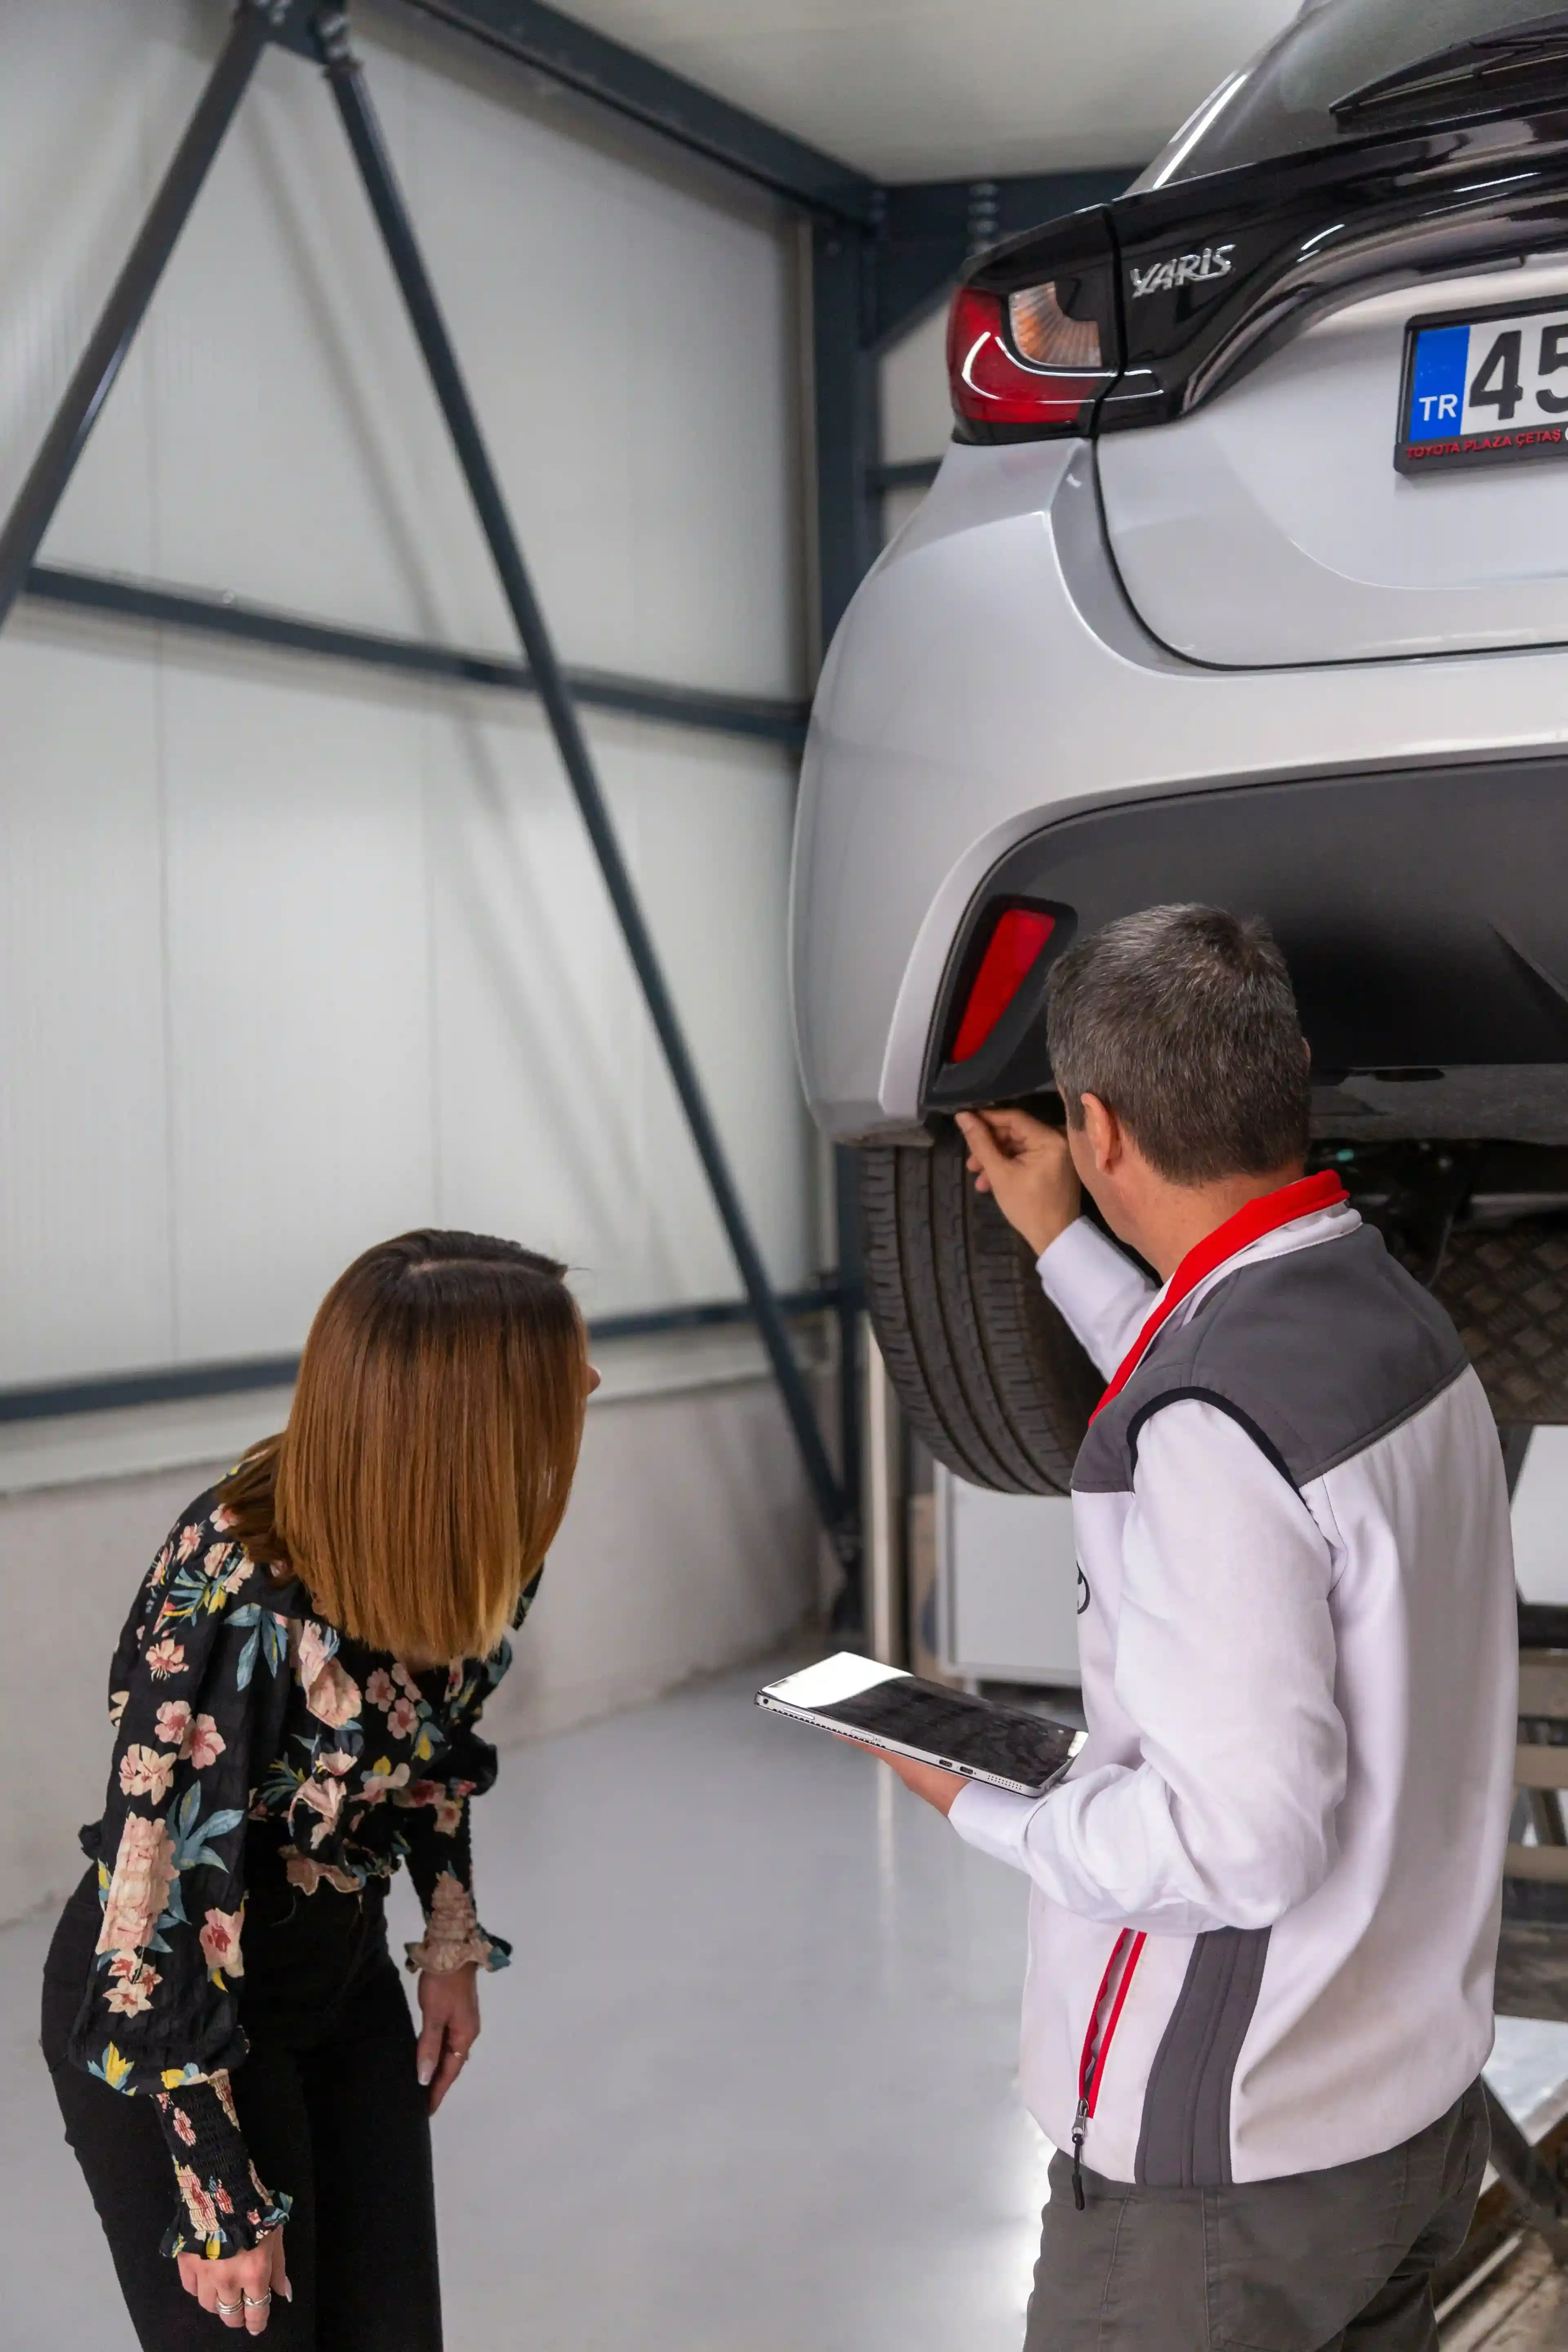
Step 1: The Wheel Spoke Visual
Direct answer: On most modern vehicles, looking through the wheel spokes with a flashlight gives a direct view of the brake caliper, rotor, and the outer edge of the brake pad. This inspection takes two minutes per wheel and requires no tools, no wheel removal, and no lift.
What you are looking at:
Position yourself at the wheel and crouch to look through the spokes toward the brake assembly. You will see three components:
The rotor: The large metal disc the brake pad clamps against. It should be smooth and flat across its face with a slight surface patina — rotors develop a thin rust layer on the surface when a car sits overnight, which wipes clean on first application. This is normal. What is not normal: deep grooves scored into the rotor face, a raised lip around the outer edge of the rotor, or a rotor face that is visibly thinner than the rotor hat (the center hub section).
The caliper: The hydraulic clamp that squeezes the pads against the rotor. It should be intact, with no fluid visible seeping from around the piston seal. A caliper leaking brake fluid is a brake failure in progress.
The brake pad: The friction material sitting between the caliper and the rotor face. The pad has a metal backing plate on one side and a friction material layer on the other — it is the friction material thickness you are assessing. New pads are 10–12mm thick. The minimum safe thickness is 3mm — approximately the thickness of two stacked quarters.
Step 2: Rotor Condition Assessment
Direct answer: Assess rotor condition by examining the rotor face for scoring, the outer edge for a raised lip, and the rotor overall for thickness. Lightly grooved rotors from normal pad wear are acceptable. Deeply scored rotors, a raised lip at the outer edge, or rotors that appear significantly thinner than the rotor hat require replacement.
Scoring: Run your fingertip across the rotor face through the wheel opening. Light surface scoring — shallow, thin lines — is normal from normal brake pad use and does not require rotor replacement if pad thickness remains adequate. Deep scoring — grooves you can catch your fingernail in — indicates the rotors have been run with excessively worn pads and are damaged. Deeply scored rotors must be replaced even if new pads are installed — a rough rotor face destroys new pads quickly and compromises stopping power.
The Rotor Lip: Look at the outer edge of the rotor — the edge that is not covered by the brake pad's contact area. In a new rotor, the outer edge is flush with the rotor face. As a rotor wears from pad contact, the center of the rotor thins while the outer edge — which the pad does not contact — remains at original thickness. This creates a raised lip at the outer edge. A lip you can see from two feet away indicates significant rotor wear. A lip you can feel with your fingertip but not easily see is approaching service limits.
Rotor Thickness: Compare the thickness of the rotor face (the disc portion) to the rotor hat (the raised center section that bolts to the hub). On a new or lightly used rotor, the disc and hat are proportional. On a heavily worn rotor, the disc is noticeably thinner than the hat. Rotors have a minimum thickness specification — a worn rotor below minimum thickness cannot safely dissipate brake heat and must be replaced.
Step 3: Brake Fluid Inspection
Direct answer: Check the brake fluid reservoir — a small translucent plastic container near the firewall on the driver's side of the engine bay — for level and color. Brake fluid should be between the min and max marks and should appear clear to light amber. Dark brown or black fluid indicates years of accumulated moisture and degradation, reducing the fluid's boiling point and compromising brake performance under hard use.
Why brake fluid color matters:
Brake fluid is hygroscopic — it absorbs moisture from the atmosphere over time. As it absorbs moisture, two things happen: it darkens in color, and its boiling point drops. Fresh DOT 3 brake fluid has a dry boiling point of 401°F. Moisture-saturated fluid boils at significantly lower temperatures — under hard braking on a long downhill grade or in performance driving, degraded brake fluid can boil inside the brake lines, creating vapor bubbles that compress under brake pedal pressure instead of transmitting force. This is brake fade — a sudden, dramatic reduction in stopping power at the worst possible moment.
For normal daily driving use, brake fluid that is merely dark rather than black still provides adequate braking performance. For any vehicle you intend to drive in mountainous terrain, with a trailer, or in any demanding application, dark brake fluid is a brake flush — $80–$150 — that should happen before that driving occurs.
Fluid Level:
Brake fluid level naturally drops slightly as brake pads wear — the caliper pistons extend further to compensate for thinner pads, drawing fluid from the reservoir. A fluid level at or just below the minimum mark on a car with worn pads is normal and expected. A fluid level significantly below minimum on a car with adequate pad thickness indicates a leak somewhere in the brake system — master cylinder, caliper, or brake line.
Step 4: The Parking Brake Check
Direct answer: Test the parking brake — also called the emergency brake or handbrake — by engaging it fully and attempting to drive forward slowly in a flat area. The vehicle should not move. A parking brake that does not hold indicates either a cable adjustment issue ($50–$150) or worn rear brake components that are not fully engaging. In vehicles with electronic parking brakes, the system should engage with a firm, audible click and hold the vehicle stationary on a slope.
On vehicles where the rear brakes double as the parking brake mechanism, a parking brake that does not hold often indicates rear brake pads and rotors that are more worn than the fronts — a common condition since rear brake inspection through wheel spokes is sometimes more difficult than front brake inspection.
What to Listen and Feel For — Dynamic Brake Indicators
The static inspection tells you what the brakes look like. The test drive tells you how they perform. These are the specific brake symptoms to identify during the road portion of the inspection.
Brake Noise
Squealing during normal braking: Most brake pads have a built-in wear indicator — a small metal tab that contacts the rotor when pad thickness reaches approximately 2–3mm, producing a high-pitched squeal. Consistent squealing during normal brake application is the brake system telling you the pads are at minimum thickness. This is the system working as designed — but it means replacement is immediate.
Grinding during braking: Metal-on-metal grinding means the friction material has worn completely through and the steel backing plate is contacting the rotor directly. This is beyond the wear indicator — it means the pads were ignored after the squeal warning. Grinding brakes require immediate pad and rotor replacement on that axle — the rotor is almost certainly damaged beyond resurfacing.
Clicking or clunking during brake application: A loose brake pad, worn caliper hardware, or a caliper that is not sliding freely on its pins produces clicking or clunking during brake application and release. Worn caliper slide pins cause the caliper to bind rather than applying and releasing evenly — producing uneven pad wear, pulling under braking, and eventually a seized caliper.
Brake Feel
Spongy or soft pedal: A brake pedal that travels significantly before resistance builds, or that requires pumping to achieve normal stopping force, indicates air in the brake lines or brake fluid contamination. Air is compressible — it absorbs pedal travel without transmitting hydraulic force to the calipers. A brake bleed ($80–$150) resolves air in the lines. If the pedal remains spongy after bleeding, the master cylinder or a caliper seal is failing.
Pulsating pedal under hard braking: A rhythmic pulsation felt through the brake pedal during firm brake application indicates warped rotors. Rotors warp from repeated hard braking that generates excess heat — the metal distorts slightly, creating thickness variation around the rotor circumference. Each time the high spot passes the brake pad, the caliper is pushed back slightly, causing the pedal pulsation. Warped rotors must be replaced — resurfacing is a temporary fix that reduces the already-thin rotor margin further.
Pulling to one side under braking: The car tracking left or right when the brakes are applied indicates uneven brake force between the front wheels — one side is braking harder than the other. Causes: a seized caliper on one side (not releasing fully), a collapsed brake hose that has blocked fluid flow to one caliper, or significantly uneven pad wear between sides. All require diagnosis and repair before the vehicle is safe to drive.
Brake Repair Costs — Your Negotiating Reference
Use these figures as reference points when calculating the value of brake findings in a price negotiation.
Brake pads only, single axle (front or rear): $150–$300 installed Brake pads and rotors, single axle: $250–$500 installed Brake pads and rotors, both axles (all four corners): $500–$1,200 installed Caliper replacement, single caliper: $200–$450 installed Brake fluid flush: $80–$150 Brake line repair: $150–$400 depending on location and length Master cylinder replacement: $300–$600 installed
Luxury and performance vehicles — Mercedes, BMW, Porsche, performance variants of mainstream brands — carry significantly higher parts costs. All-around brake replacement on a BMW 5-series or Mercedes E-class can reach $2,500–$4,000.

Car Negotiation Scripts: Word-for-Word Lines That Could Save You Money
Car negotiation scripts for real scenarios. Learn exactly what to say, using facts like VIN reports and inspections to keep leverage on your side.
Putting It Together: What Your Findings Mean
Clean inspection: Pads above 5mm, rotors smooth with no lip, fluid clear and at correct level, parking brake holds, no noise or pedal abnormality on the test drive. No immediate brake costs. Proceed to the pre-purchase inspection with brake condition confirmed adequate.
Minor findings: Pads at 4–5mm (adequate but within one year of replacement), light surface scoring on rotors, fluid slightly dark but not black. These are negotiating points worth $150–$300 per axle depending on what needs attention within the near term.
Significant findings: Pads at or below 3mm, rotors with visible lip or deep scoring, dark brake fluid, any grinding noise. Brake replacement across affected axles is an immediate cost — get a quote before negotiating and deduct it from the offer.
Walk-away findings: Complete pad wear-through with metal-on-metal grinding on multiple wheels, a spongy pedal that does not firm up with pumping (indicates master cylinder or major hydraulic failure), or visible brake fluid leaking from a caliper or line. These indicate a vehicle with deferred safety maintenance at a level that suggests other systems have been similarly neglected.
The Pre-Purchase Inspection: The Best $150 You Will Ever Spend
A pre-purchase inspection (PPI) is a mechanic’s check before buying. It reveals hidden issues and is the highest-value step to avoid costly surprises.

The Used Car Test Drive Checklist: 23 Things to Assess Before You Buy
A test drive reveals issues unseen at rest. Learn how to evaluate performance, handling, and braking before buying.